Knowledge Base
Adding FX to Your SP or MP Map
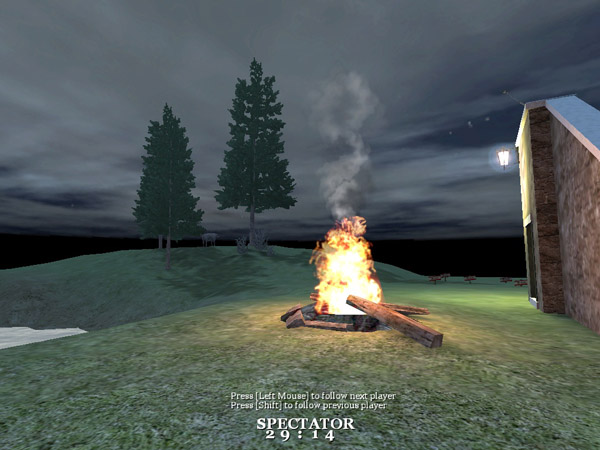
In this tutorial we are going to add a small fire and some smoke to an area on our map thats already setup for it
Adding FX
So your at the point in your map that you would like to add some FX's to it. In CoD we add this by means of a script rather then entities in our map. Some may view this as a hassle but it really offers some flexibility as this can be added, altered, or removed without doing anything to your map file and/or needs for additional compiles.
In this tutorial we are going to add a small fire and some smoke to an area on our map thats already setup for it. There are many, many FX's that can be found in the pak5.pk3 file. They have the file extension .efx and I like to extract them out of the pak5.pk3 so that I can view the folder location and file names with ease. You can also find scripting features in the _fx.gsc file in the same pk3 file.
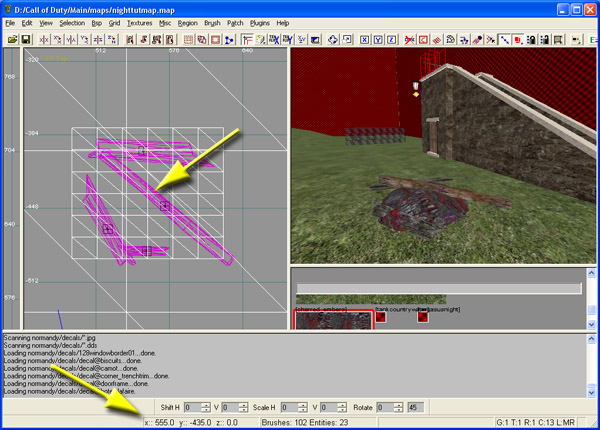
Ok, so lets add some fire and smoke to our map. First lets open the map to simply get some reference information for our script file. After we have our map open lets go to the XY Top view and place your mouse over the location we want our FX's to be. You will notice that at the bottom of our CoDR we have X,Y, and Z coordinates of where our mouse is. In this XY Top view we can only get the X and Y location which we will note for later.
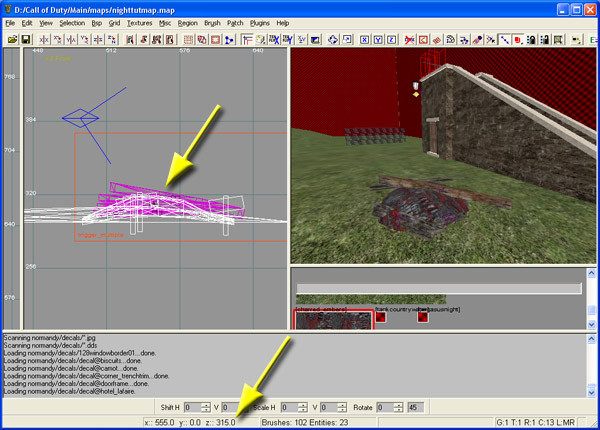
Then lets go to the XZ Front view so that we can pin down our last coordinate, Z. Again move your mouse to the location and note the value.
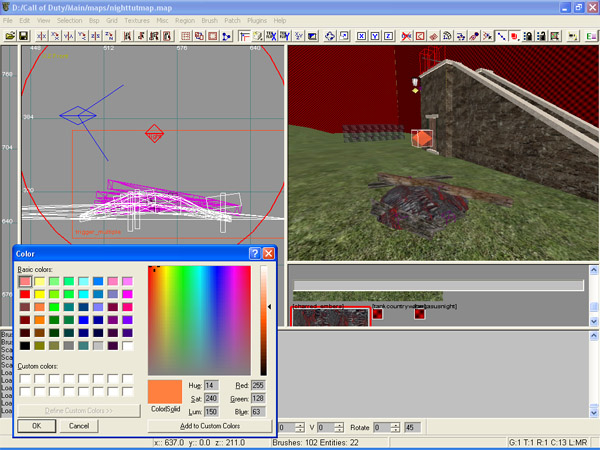
Lets add to extra entities to our map just to add a real feeling that the fire is there. We are first going to add a light where the fire will be (I will assume by now you are familiar with how to create lights so we wont go into detail on it). Once you get it in location and the size you want it, lets change the color to fit the glow that comes off of a fire. Hightlight the light and hit "K". I am going to use a orange shade.
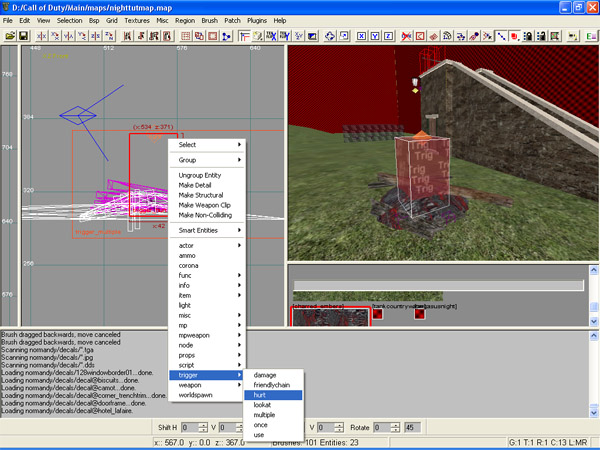
Now lets make a hurt trigger brush so that when you in the fire the player will take on damage. Create a brush the size and location of your fire. Then right click on it in a 2D view and go to Trigger>hurt (There are options to setup variables for a hurt trigger but we will not go into those in this tutorial). Next we want to texture the whole brush with the Common>trigger texture. We can now save the map file and compile it.
Last, lets setup the script file that will call the FX's and place them where we want in the map; the X, Y, and Z locations we noted earlier. Either open your current .gsc file or if you dont have one we will make one. If you need to make one simply make a .txt file and name it that same name as your map file.
Now we are ready to add the script information to our .txt, or current .gsc, that will add our FX's. For our fire we are going to add:
level._effect["fire"] = loadfx ("fx/fire/tinybon.efx");
maps\mp\_fx::loopfx("fire", (555, -435, 315), 0.6);
and for our smoke we are going to add:
level._effect["smoke"] = loadfx ("fx/smoke/ash_smoke.efx");
maps\mp\_fx::loopfx("smoke", (555, -435, 370), 0.7);
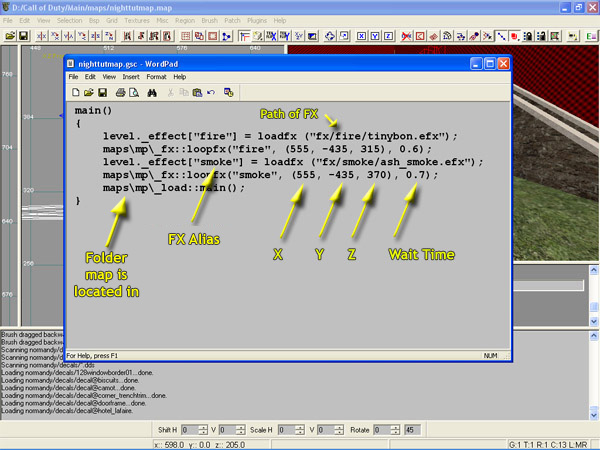
Your final finished script should be in this format:
main()
{
level._effect["fire"] = loadfx ("fx/fire/tinybon.efx");
maps\mp\_fx::loopfx("fire", (555, -435, 315), 0.6);
level._effect["smoke"] = loadfx ("fx/smoke/ash_smoke.efx");
maps\mp\_fx::loopfx("smoke", (555, -435, 370), 0.7);
maps\mp\_load::main();
}
To best explain what does what I have labled a shot of the script file. Dont forget to rename your .txt file to a .gsc file. You can setup your pc to simply open .gsc files in whatever text editor you want for future editing.
Finally, save the .gsc file, place it in the same folder that your bsp file exists, and test it in game.
Special thanks to Kalahad for this information.
Tutorial by General Death