Knowledge Base
Adding Water Effects
1.) First of All..., Make a Brush where you want the water to be.
It might be a Good thing to have a Space to Put Water. Insted of Just Flat Land.
Have your Brush Ready, and Click Patch>Simple Terrain Mesh, and lets go with a 6 by 6.
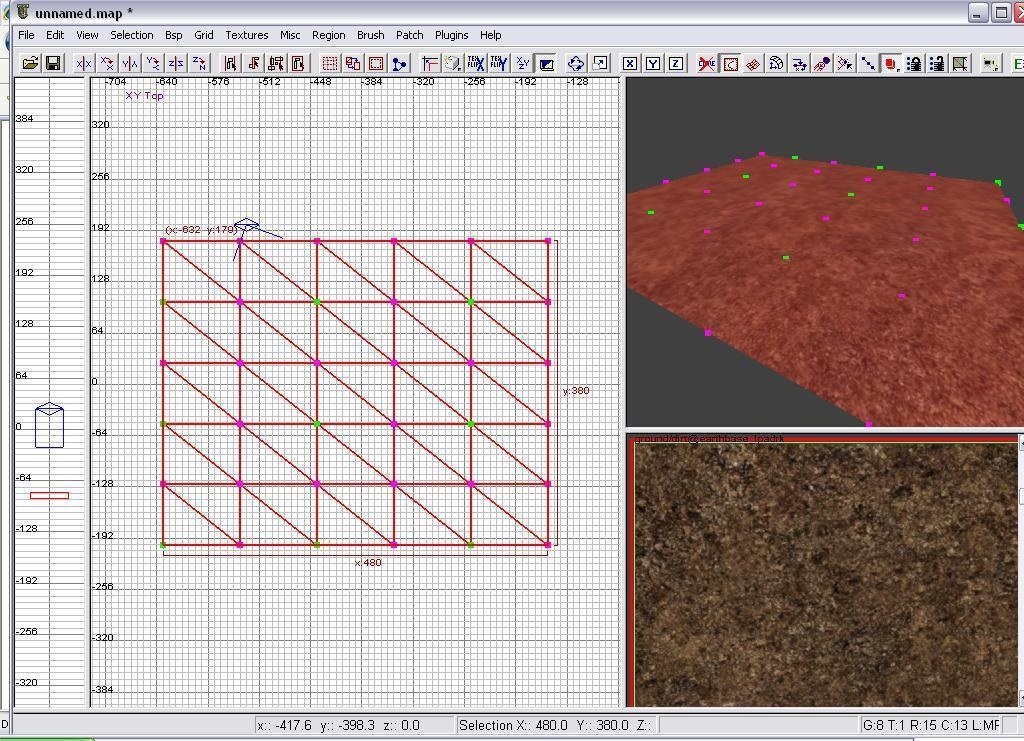
Ok, now After you have Selected the 6 by 6 Terrain Mesh, Press V to Show/Edit the Verticles.
Now, there should be Little colored Squares on the Terrain Mesh (Ground). These Squares are the Pivit Points at which you "Shape" the Land.

Ok! Now Grab the Pivit Points and Shape the Mesh How You Want it (Suitible for a Pond or River.. you know, to add Water.)
2.) Adding The Water
Ok Now we can Actually Start the Part of this tut that you came for!
Hint: (Clip = Not Able to Walk Through)(Non-Clip = Able to Walk Through)
Alright, First of all. Go to Textures>Common and Scroll Down Till you Find Water. Make Sure the Title of it isnt Water Clip! (Unless you dont want people to walk IN the water)
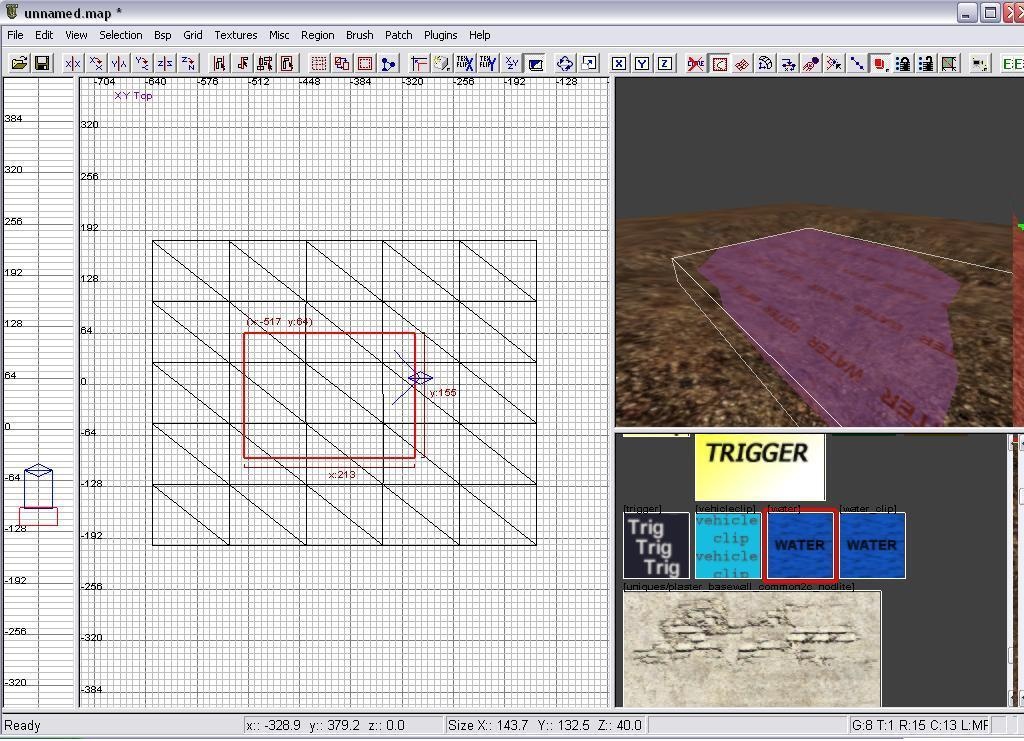
Ok, Now That you Have the Water in the Hole you Made for it.. We Can Make it Look like water. (Effects!)
3.) Adding Effects
Ok Here We Go. This is the Easy Part!
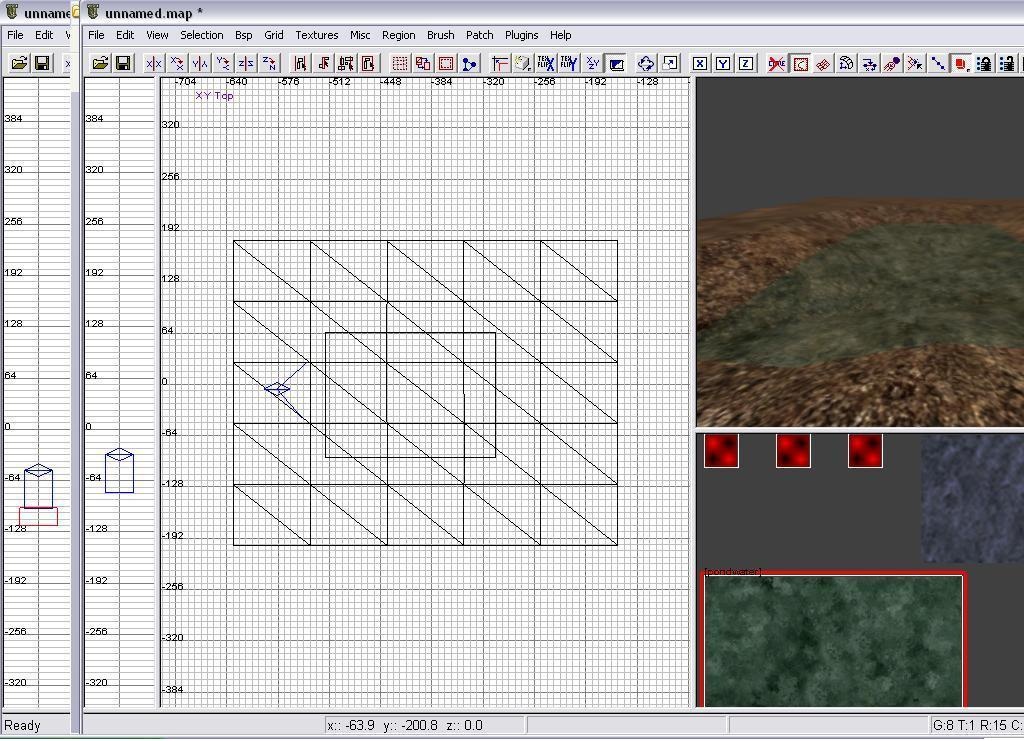
Make sure the Water Brush you made is Deselected. -Just Hold Down Ctrl+Shift and Click the Top of the Water Brush you made.
The Border Around the Top Should now be Yellow.
OK! now, Go to the Textures Menu, and Select Sfx. Scroll Down until you find the"Pond Water" Texture
With the Top of the Water Texture Still Selected.. Click The Texture. And it All should look something like This:
Alright! Thats It. Now you Have your Water.
Thanks To Shanehayesr (Thats Me!!)
Cya